
YOUTUBE VIDEO

YOUTUBE VIDEO

YOUTUBE VIDEO

YOUTUBE VIDEO

YOUTUBE VIDEO

YOUTUBE VIDEO

YOUTUBE VIDEO

YOUTUBE VIDEO

YOUTUBE VIDEO

YOUTUBE VIDEO

YOUTUBE VIDEO

YOUTUBE VIDEO

YOUTUBE VIDEO

YOUTUBE VIDEO

YOUTUBE VIDEO

YOUTUBE VIDEO

YOUTUBE VIDEO

YOUTUBE VIDEO

YOUTUBE VIDEO

IMAGING THE SUN (TUTORIALS) - PDF FILE (5Mb)

IMAGING THE SUN (POWERPOINT PRESENTATION) - PDF FILE (4.5Mb)

DEEP-SKY IMAGING (TUTORIALS) - PDF FILE (1Mb)
FULL DISK IMAGING (SUN)
Acquire Full Disk images
Save AVI files or SER files (12 bits)
Open AVISTACK or AUTOSTAKKERThttp://www.avistack.de/
Select AVI or SER files
Turn off Update display
Choose Batch processing - Batch processing
Open REGISTAX http://www.astronomie.be/registax/
Open FIT file (aligned and stacked in Avisatck or Autostakkert)
Process the combined image using the Wavelet-based image restoration
Reset the Wavelet filter (500 to 1000 center value)
Use layer 1, 2 and 3 of Wavelet filter (try several options)
Process image (DO ALL button)
Save image (16-bit TIFF file)
Compose the Mosaic
Open Microsoft ICE http://research.microsoft.com/en-us/um/redmond/groups/ivm/ice/
Compose the Mosaic (drop individual images into Microsoft ICE) Mosaic image (Full Disk)
Crop and save 16-bit TIF file (Microsoft ICE)
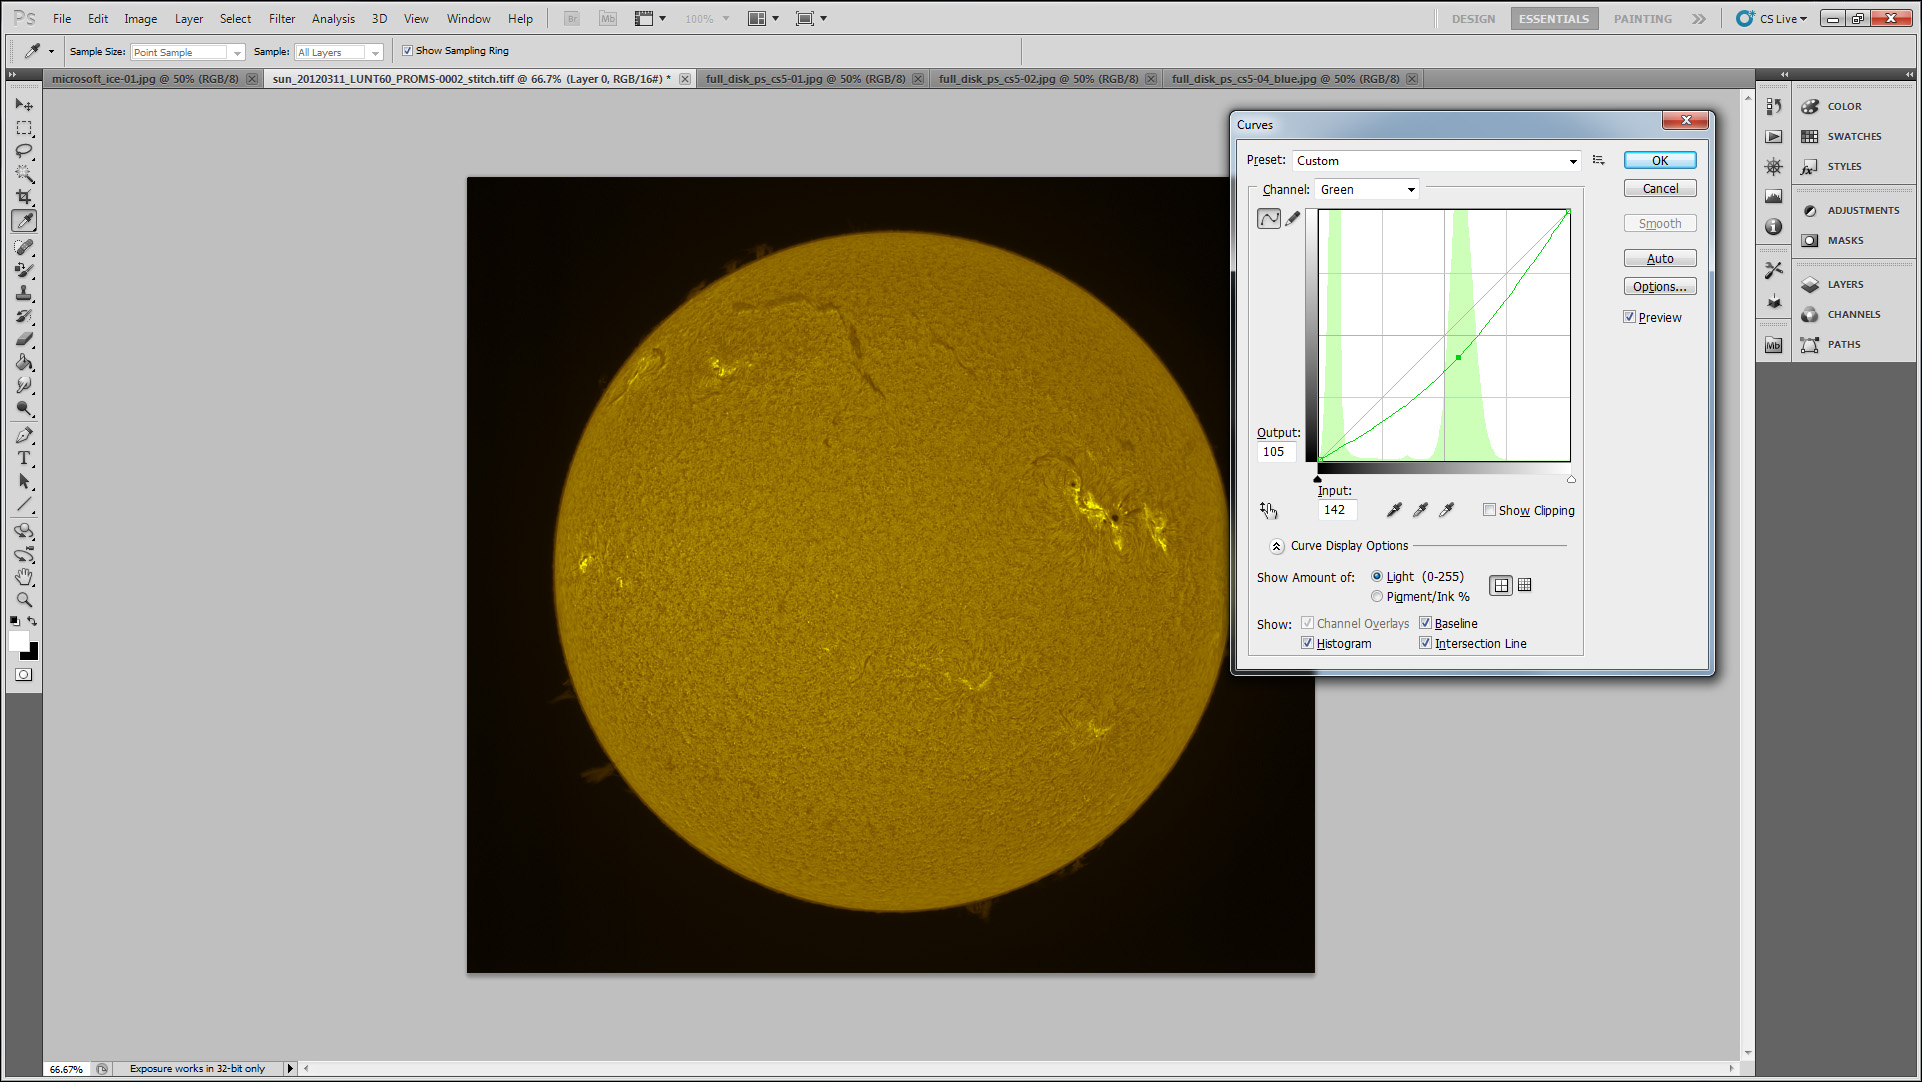
Process TIFF file in Photoshop Mosaic Image
Use Curves to adjust contrast and brightness if necessary Curves
Use Shadow/Highlights option Shadow/Highlights
Use Smart Sharpen if necessary
False Color Mapping BLUE CHANNEL GREEN CHANNEL RED CHANNEL
Save the final 16-bit TIF file (no compression)
Convert to 8-bit and save JPG file (no compression)

FULL SIZE - Imaging Session FULL DISK - DISK

FULL SIZE - Imaging Session FULL DISK - PROMS

FULL SIZE - Imaging Session FULL DISK - CaK

 HIGH RESOLUTION WHITE LIGHT (CONTINUUM) IMAGING (SUN)
Acquire high resolution WL images
HIGH RESOLUTION WHITE LIGHT (CONTINUUM) IMAGING (SUN)
Acquire high resolution WL images
Save AVI files or SER files (12 bits) (DMK or SKYnyx cameras)
Open AVISTACK or AUTOSTAKKERThttp://www.avistack.de/
Select AVI or SER files Open movie
Turn off Update display
Choose Batch processing - Batch processing
Open REGISTAX http://www.astronomie.be/registax/
Open FIT file (aligned and stacked in Avisatck) Open Fit file
Process the combined image using Wavelet-based image restoration
Reset the Wavelet filter (500 to 1000 center value) Wavelet Tab
Use layer 1, 2 and 3 of Wavelet filter - Gaussian (try several options) Wavelet-based image restoration
Process image (DO ALL button) Do All
Save image (16-bit TIFF file) Save TIFF 16-bit
Process TIFF file in Photoshop
Use Smart Sharpen Smart Sharpen
Use Curves to adjust contrast and brightness Curves
False color image False Color
Save the final 16-bit TIF file (no compression)
Convert to 8-bit and save JPG file (no compression)


FULL SIZE

FULL SIZE
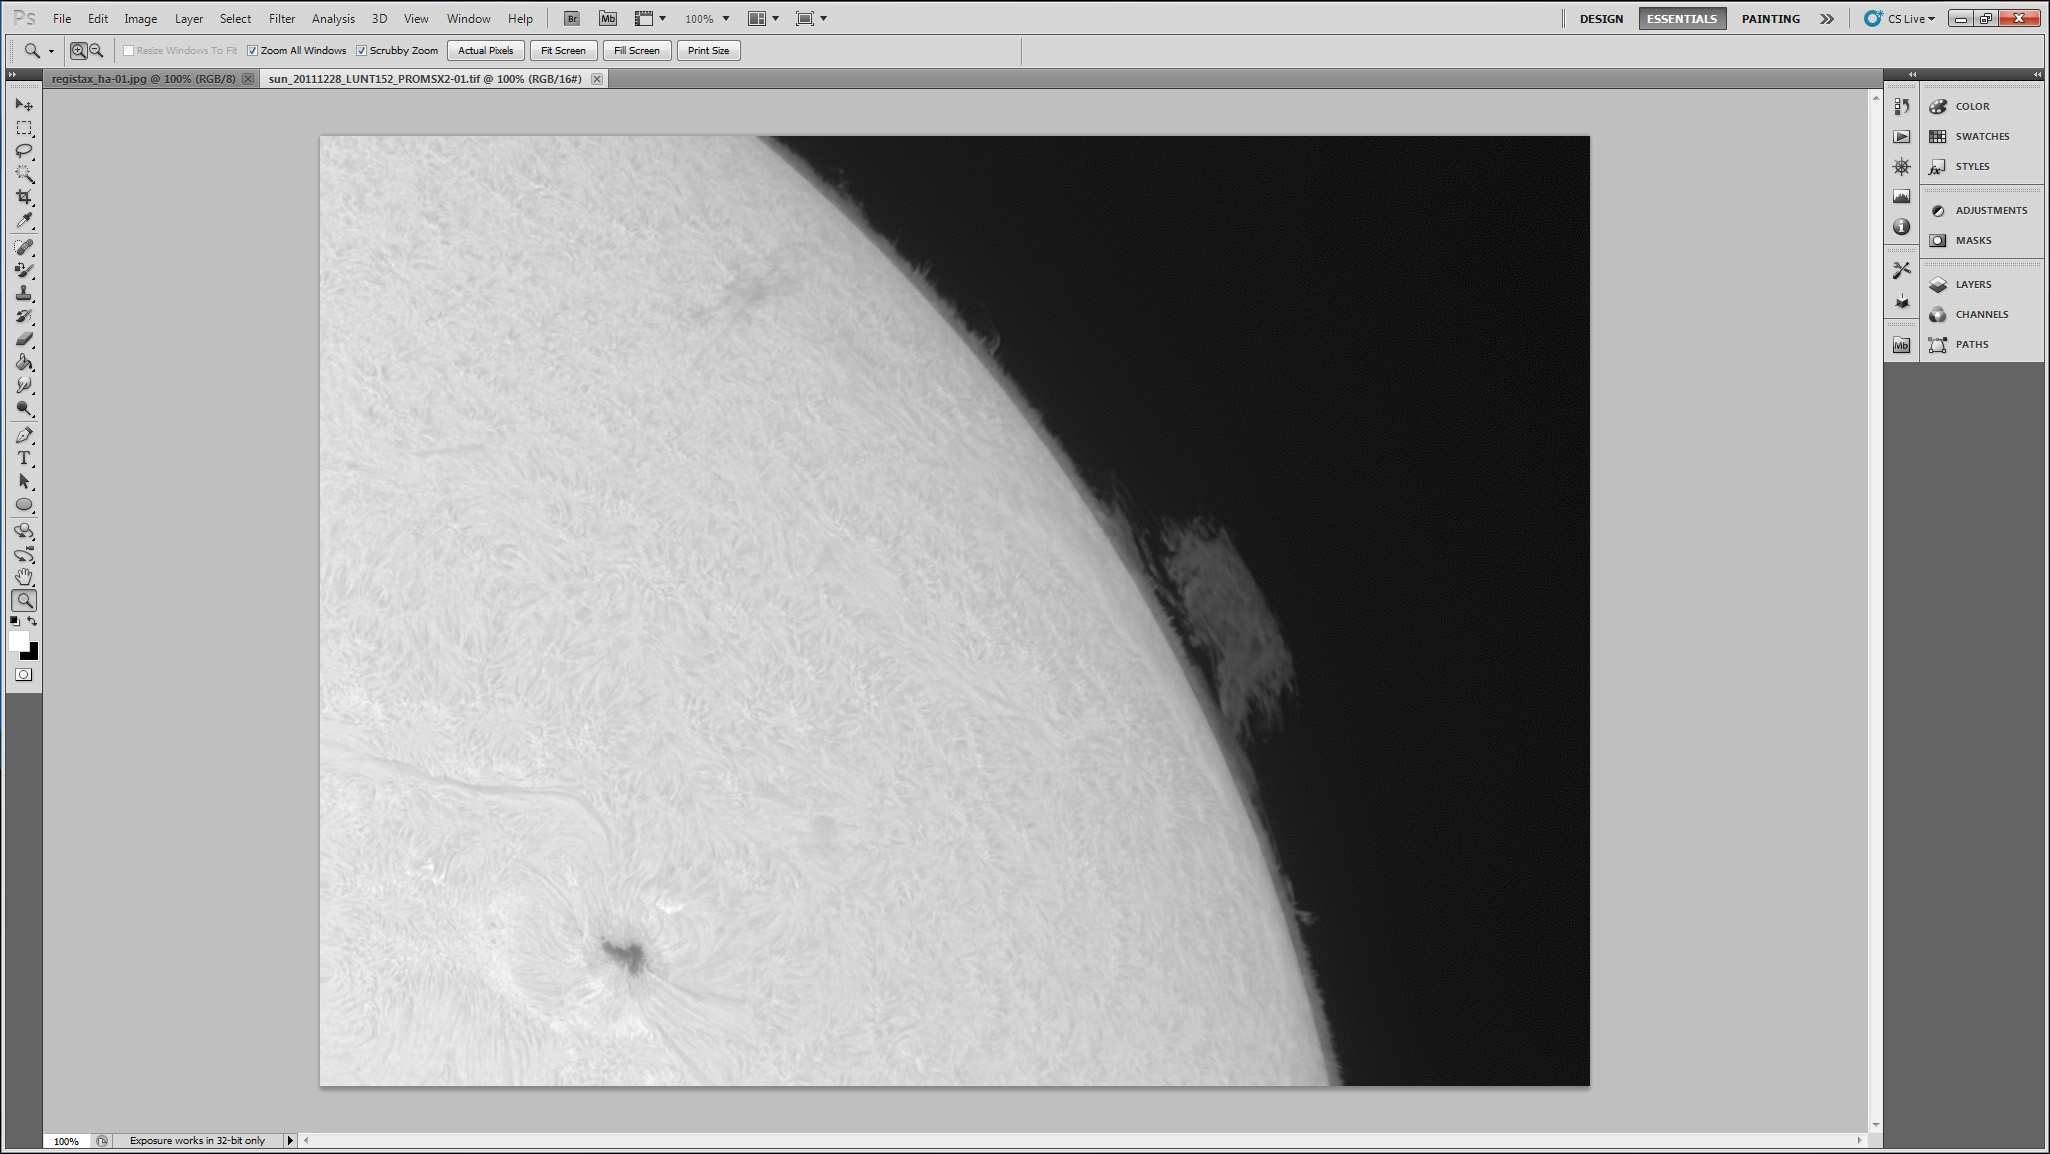
HIGH RESOLUTION H-ALPHA IMAGING (SUN)
Acquire high resolution H-alpha images (50 to 75 gamma DISK/ 200 to 250 gamma PROMS - DMK cameras)
Save AVI files or SER files (12 bits) (DMK or SKYnyx cameras)
Align and Stack images in AVISTACK or AUTOSTAKKERT http://www.avistack.de/
Open REGISTAX http://www.astronomie.be/registax/
Open FIT file (aligned and stacked in Avisatck)
Process the combined image using Wavelet-based image restoration
Reset the Wavelet filter (500 to 1000 center value)
Use layer 1, 2 and 3 of Wavelet filter - gaussian (try several options) Wavelet-based image restoration
Save image (16-bit TIFF file)
Process TIFF file in Photoshop PS CS5
Use Curves to adjust contrast and brightness if necessary Curves
Use Shadow/Highlights option Shadow/Highlights
Use Smart Sharpen or Unsharp Mask
False Color Mapping BLUE CHANNEL GREEN CHANNEL RED CHANNEL
Save the final 16-bit TIF file (no compression)
Convert to 8-bit and save JPG file (no compression)


 ARTIFICIAL FLAT-FIELD (SUN)
Open mosaic image (16-bit TIFF file) Open File
ARTIFICIAL FLAT-FIELD (SUN)
Open mosaic image (16-bit TIFF file) Open File
Create a new Layer Duplicate Layer
Create a Mask Create Mask
Copy mosaic image to Mask
Apply a Median Filter (e.g. radius 25) Median Filter
Reduce Mask brighthness (Curves) Reduce Mask brighthness
Apply Mask (Difference) Apply Mask
Reduce Mask Opacity if needed Reduce Mask Opacity
Flaten Layers
Use Curves and/or Levels to adjust contrast and brightness Use Curves and/or Levels
Save flat-field corrected image (16-bit TIFF file)
Before/After BEFORE/AFTER

Uncorrected mosaic image (Left)/flat-field corrected image (Right)
AUTOSTAKKERT 2

FULL SIZE
HR Solar images aligned and stacked with Autostakkert 2. Number of stacked images (100, 250, 500 and 1000). LUNT152 F/6, 2" Lunt Solar Wedge, X3 Barlow, DMK41 (20120211).

FULL SIZE
HR Solar images aligned and stacked with Autostakkert 2, processed with Registax 6, and Photoshop 5. LUNT152 F/6, 2" Lunt Solar Wedge, X3 Barlow, DMK41 (20120211).
H-ALPHA IMAGE PROCESSING FLOW (DEEP-SKY)
Acquire deep-sky images
Calibrate, align and combine CCD images (Maxim DL)
Calibrate raw images
Use manual (2 stars) or automatic alignment operations (Auto correlation or Auto star matching)
Use SDMask or Sigma Clip for all combination operations
Perform a DDP-style stretch on the combined image (Don't do any sharpening as part of DDP.
This is accomplished by selecting the "user" kernel filter, and setting the filter coefficients to 1.0 in the center, and zeros elsewhere). DDP with a small sharpening can also be used with good results (FFT Low-Pass, Custom 25 a 35% Cutoff)
Save the image (FITS format IEEE Float)
Final Processing (Photoshop CS3, CS5)
Load the FITS DDP-stretched image into Photoshop (using Fits Liberator)
Use Curves to ajust contrast and brightness
Use (if necessary) Neat Image Photoshop plug-in to remove grain
Save the final 16-bit TIF file
Convert to 8-bit and save JPG file
 LINKS
LINKS
Image processing
CCD Revolution
CCD imaging
HOME
|